Several friends have told me they love the drinks I make on my Instagram page (@architecture_of_the_cocktail) but would like to hear my take on how to set up a home bar. As we head into the holidays, many of us entertaining for the first time in a year and a half, so I have broken down my thoughts on the idea. The basic home bar setup – one that will allow you to make the vast majority of cocktails out there without any obscure spirts or mixers, and without any elaborate preparation of equipment. So here we go. The following will be posted weekly. Feel free to disagree. It’s your bar and your cocktails.
WEEK 1: Tools
WEEK 2: Spirits
WEEK 3: Technique
Week 4: Glassware
Home Bar 101 – WEEK 3: Technique
THE ESSENTIALS – Summary
So, you have the right tools, and a couple of bottles of quality alcohol – and maybe a mixer or two – but to elevate your efforts from mixing drinks to craft cocktails, you need to add the craft component. The technique of making a great cocktail. It is more than dumping things together and adding ice cubes. Any idiot can make a Screwdriver. But it takes more to make a balanced Manhattan or Martini.
There are a number of crazy techniques that are used in making cocktails and mixed drinks (technically, a cocktail MUST have a spirit, sugar, water, and bitters – but for the purpose of this text, we will refer to anything being made as a cocktail), but really there are only four things that you need to be able to do. Building, shaking, stirring, and garnishes. Everything else is extra. These essentials are all for the same purposes: cooling a cocktail, diluting a cocktail (necessary), and melding the flavors together.
The one universal in cocktails (with very rare exception) is that drinks containing fruit (and juice), egg, and milk are always shaken. All others are built or stirred. The reason, if it will help you remember, is that those three items benefit from aeration and microbubbles and create a much better experience in your mouth – creamier, richer, and silky. The reason you don’t shake everything is that spirit-forward cocktails will become cloudy from the bubbles, will look less appealing (think of a crystal clear martini), and the aeration can inhibit some spirits from opening up and will hide subtleties within (with gin the term is ‘bruising’ the gin).
That’s the what and the why, now the how.
THE ESSENTIALS –Building
When you are called to build a drink in the glass – it really is that simple. You just add ingredients – typically over ice – to a glass and there you go. However, there are a couple of nuanced suggestions or hints to make the drink easier to make and possibly better. Then first point that most people do not consider is to start by adding your ice to the glass and give it a few moments to acclimate to room temperature. Especially a block of ice. You want to temper the ice before adding the spirits. If the ice is right out of the freezer, the temperature on the surface will begin to raise quickly, and if you add the spirits too soon the block can crack or shatter. If the ice is allowed to sit for a few minutes, it will be less likely to break and you will get the added benefit of using it to chill the glass.
You typically want to add the ingredients in the order they are listed, from top to bottom. Sugary modifiers or liqueurs are denser and will sink to the bottom of the glass where you have to grab them and distribute throughout the drink by stirring. Alcohols by contrast, especially higher proof alcohols, will want to sit above the surgery base. By pouring the liqueur or carbonated water last it will use gravity to already start to meld the ingredients together. If you have ever had a poorly made gin and tonic – you will know what I mean. The top of the glass still has most of the alcohol in it.
The exception is topping a drink or layering a drink, where you are trying to maintain the spirit’s relative position in the drink. More on that later.
In a traditional Japanese Highball, fof instance, the ice is placed in a collins glass and stirred with only the ice in the glass. Any melted water is poured out then the drink is made. This tempers the ice and cools the glass. The whiskey is added, the drink is stirred, the water is added, and it is stirred again. In a Japanese Highball Mizuwari, the height of Japanese craft cocktails, the ice is added (the best, clearest blocks of ice) and stirred until the glass begins to frost, then the excess water is poured out. The whiskey is added, and the drink is stirred exactly 13 and 1/2 times clockwise. The sparkling water is added, and it is stirred another 3 and 1/2 times, for a total of 17 evolutions. Does this matter? Only if you appreciate that the ritual of making something can make it more special.
THE ESSENTIALS – Stirring
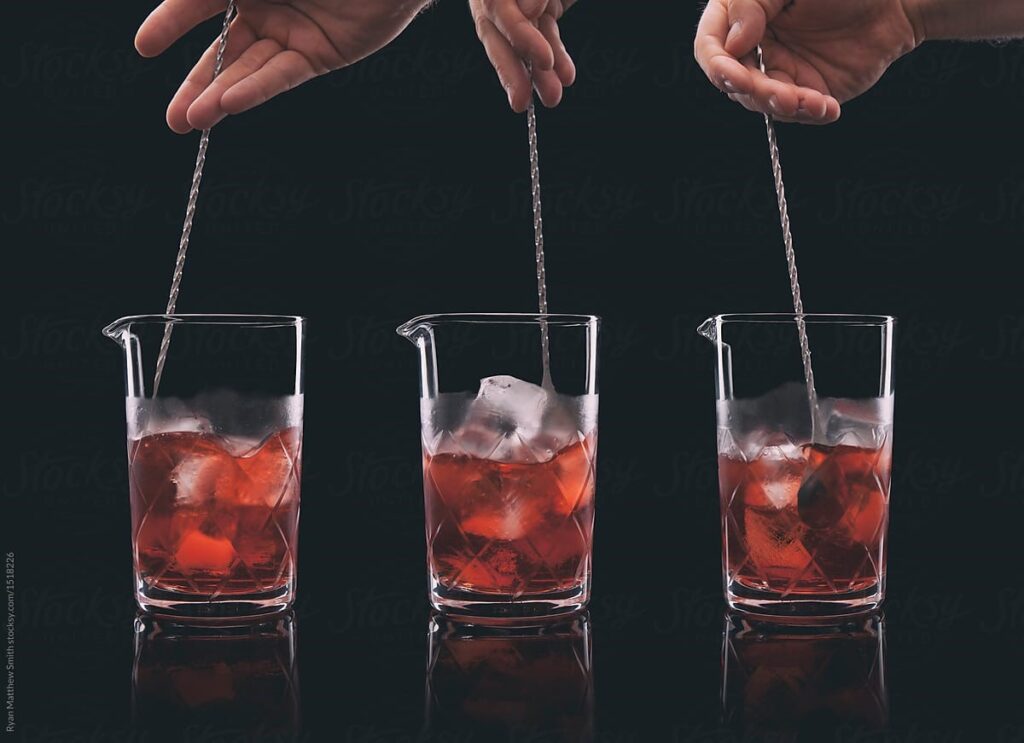
Stirring is used in cocktails to dilute and to quickly cool a drink. At first this may seem counter intuitive, but you want to agitate the drink with ice. The faster you cool it down, the less it will dilute as you sip it. The greater the temperature difference between the liquid and the ice, the faster the ice will melt. This is why you stir (or shake) and always strain over fresh ice. If the drink is cold as it hits the ice, it will stay cold in the glass without becoming a watery mess.
How to Stir
Grab your mixing glass (from the freezer if possible) and add all your ingredients. Pro-tip: start with the cheapest item first, so if you mess up you are throwing away an ounce of $15 vermouth, and not 2 ounces of a $60 bourbon. Add ice (the largest chunks you can get – never stir with crushed or pebble ice) to a level that is about 50% higher than the liquid and insert the spoon. This is where you may need to practice. Hold the shaft of the spoon between your middle finger and ring finger (this is why you want a long handled spoon) and place the mixing spoon in so the convex bottom of the spoon is in contact with the inside face of the glass, but not touching the bottom. Begin rotating the spoon around, maintaining contact with the glass. You don’t want to hit the ice and break it up, and when doing it properly you will form a vortex. It should be a very quiet process. Practice in an empty glass, or just keep making drinks to get the method down. I typically use 30 seconds as a default. 20 is not cold enough, and longer adds too much water. But experiment to find your sweet spot. This effort should add somewhere in the neighborhood of 3/4oz to 1oz of water. This also may seem counterintuitive – why water down your favorite spirit? The water will take some of the bite or heat off the spirit, and in much the same way you want to add a little water to whiskey or scotch served neat, the water will open up the spirit and other flavor components, actually making it MORE flavorful.
Remove the spoon and place the hawthorn strainer in the mouth of the mixing glass (or julep strainer if you prefer) and pour the stirred drink in your glass over fresh ice. Toss the ice from the mixing glass out and start over with new ice for the next drink. Done. It’s not hard, but you still want to practice. Even if only to look like you know what you are doing.
THE ESSENTIALS – Shaking (wet)
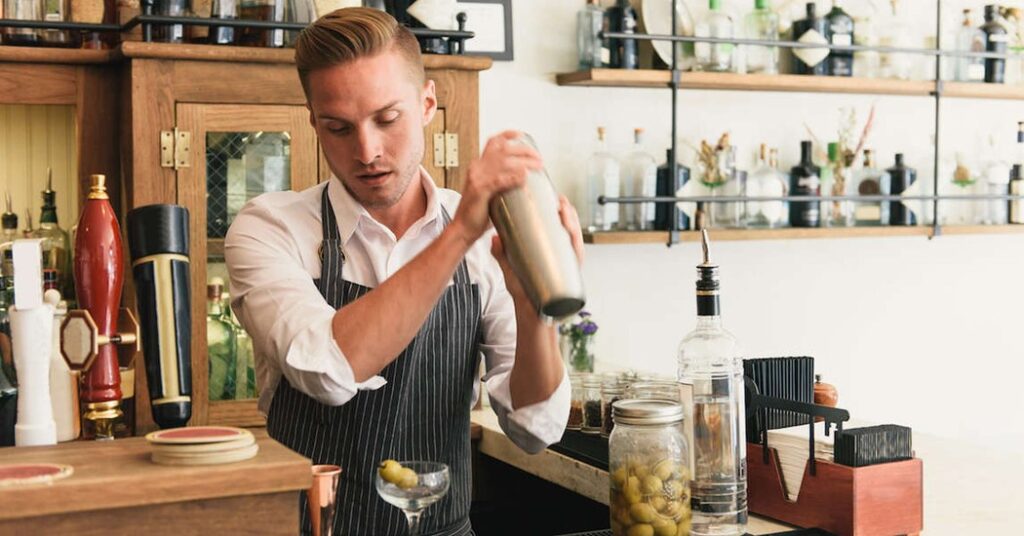
You (wet) shake a drink for the same reason – meld the flavors, dilute the drink, and cool it down. I typically build the cocktail in the small tin (I am going to assume you are using a tin-on-tin Boston Shaker). When ready, add ice to the large side, then pour the liquid into the larger half, nest the two together and ‘pop’ the bottom of the small tin to seat it tightly with the heel of your palm. The mouths of both tins are thin metal, so they will immediately begin to contract and bind together to form a seal thanks to the ice. There are as many ways to shake as there are bartenders, but you want to keep two things in mind. First, try to reduce the contact with your hand on the metal to reduce the transfer of heat. This fights the cooling you are trying to accomplish. Second, don’t shake like a piston – back and forth. This will cause the ice to crash into itself and break up, accelerating dilution. I use a motion that is somewhat like an arcing figure 8. Allowing the returning liquid and ice to begin traveling back either over or under the ice. That is probably a terrible way to describe it – just don’t piston the shaker.
Many bartenders modify how they shake, some in front of their chest, some up at their shoulders. They may make hundreds of drinks in a single shift, so repetitive damage is a real possibility, and many find their own way that reduces wear and tear, as well as fatigue.
I typically shake for 15 seconds for simplicity, but there is actually a sweet spot somewhere between 13 and 15 seconds. If you do it enough, you can hear a very slight change as the ice begins to round off and the noise becomes ‘softer’. Next you need to strain, but the tough part may be getting the tins apart. If they are stuck, place the tins on your work surface and hold the bottom (large) tin with one hand and use the heel of the palm of your other hand to smack the small tin perpendicular to the tin (parallel to the work surface). This should break the seal. Lift the small tin off, allow any liquid to run back into the large tin, and grab your hawthorn strainer. Strain into a chilled cocktail glass and you are done. If you like martinis or daiquiris, for instance, and don’t want small shards of ice floating on the surface of your new masterpiece, you can strain the shaker into a second, finer strainer – referred to as double straining. It is not necessary but will look better.

THE ESSENTIALS – Shaking (dry)
Dry shaking is exactly the same as wet shaking, except you exclude the ice and do it before wet shaking. This is used whenever you are using egg whites. The proteins in an egg white are tightly packed and as they are aerated, the spirals unravel and expand, grabbing onto micro bubbles and creating a relatively stable foam. This is basically the same as making a meringue for a pie. You want to dry shake for 30-45 seconds (depending on how frothy you want the drink), then open the tins and add ice, and (wet) shake for an additional 15 seconds. Double strain into a chilled cocktail glass to catch not only ice shards, but any solids left from the egg white. You will want to give the drink a few seconds for the foam to consolidate at the top and you have a beautiful cocktail that has a wonderful and rich creaminess to it thanks to the air bubbles. The egg white adds nothing to the drink taste-wise, so the only reason you do this is for mouthfeel and the look. It can change the smell of a drink – which is why bitters are sometimes added to the egg white to cover the smell.
THE ESSENTIALS – Reverse Dry Shake
This is pretty much as it sounds. You add the ice in the beginning and shake for 15 seconds, then strain from one tin into the other. Discard the ice and follow up with your dry shake. Some people swear by one, some swear by the other. There is some evidence out there that the drink foams better with a reverse shake, but also evidence that once you take the ice out and hold the tins in your hands to dry shake, you begin to warm up the cocktail. I always dry shake first then wet shake, and am never unhappy with the results. It’s your drink – make it the way you want.
Now a lot of people are uncomfortable with the concept of adding raw egg to your cocktail. If so – don’t do it. But they have been adding egg whites to cocktails since at least the 1860’s and I’m not aware of any outbreaks of salmonella resulting from it. Salmonella is typically on the outside of the shell, so you can wash the eggshell first if you want (but right before using to maintain the protective coating). Or use pasteurized egg whites – which is what most restaurants and bars do. This will negate the possibility of salmonella. If you are vegan, aquafaba (chickpea juice) is often used as a vegan substitute for egg white. Just use the same amount as the egg white (approximately 3/4 ounce).
THE ESSENTIALS – Garnishes
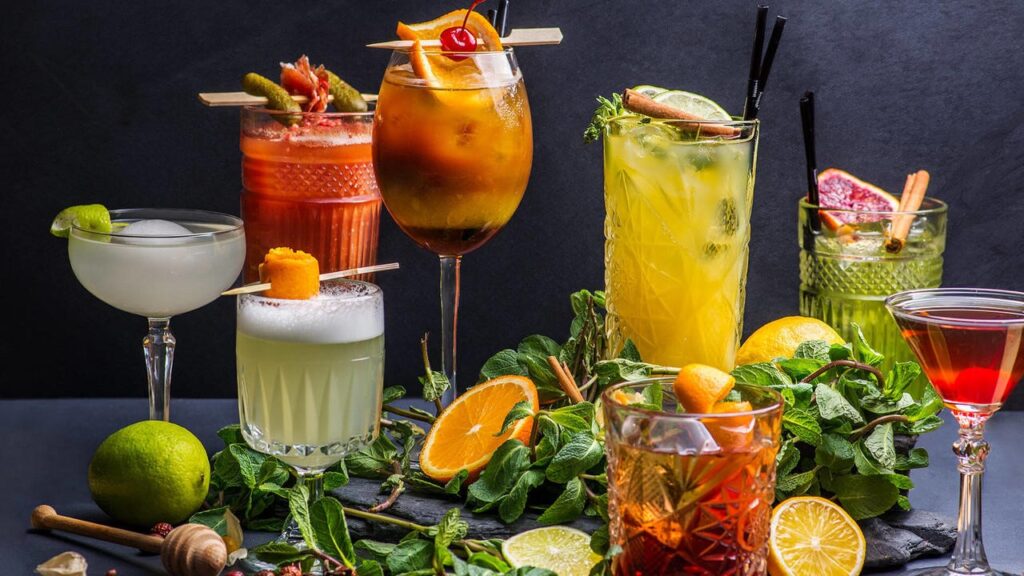
The garnish gets a pretty bad rap. It is looked at by many as window dressing. Nothing more than a pretty little bow on top of a package. And while many garnishes are excessive, if not beautiful, they play a very important role in the cocktail. Some, like a sprig of mint, introduce a wonderful bouquet of smells, affecting the first sip to follow. Others, like the expressed oil from an orange or lemon peel, layer fine citrus oils across the surface of the drink affecting not only your sense of smell, but the taste and texture of the drink. The garnish is loosely anything that is placed on or in the drink after it is made that has an effect on the drink experience, and can be broken down into the following:
Rimming
A salted rim is part of a classically served margarita. Salt enhances and balances other flavors, and in the Margarita, it intensified both the sweet and the sour components of the drink. Rub the rim of your glass with the freshly cut fruit (or simple syrup if it is sugar) and invert it onto a small serving plate with a layer of salt (never use table salt – only sea salt). Set aside to dry before adding the drink. The contemporary method is to wipe only one side, so you allow the drinker the choice of salt (or sugar, ot tajin) or not.
Twist
The twist is just how it sounds, but that still doesn’t make it easy. Use a simple peeler to cut a strip from the fruit of choice. I always trim a strip – clean it up on all four sides into a 1/4” to 3/8” wide strip. Always peel from top to bottom, and with a smaller fruit go at a slight angle to get a little more length. Once the drink is made, turn the twist into a long spiral with the peel out, and pull slightly. The oils in the peel will be forced out over the drink in a very fine mist. At this point it can be placed in the glass, or across the rim. Be aware that the peel will continue to release oils, and bitter from the pith, into the drink. I always add orange and grapefruit twists to the drink, but often place the lemon or lime on the rim (usually in a decorative shape). The lemon and lime are much bolder and sharper tastes and can knock a drink out of balance if left in too long.
Zest/Coin
This is similar to a Twist. A wide strip or oval is cut off the fruit and once the drink is complete and in the glass it is held between the fingers horizontally with the peel facing the drink. The sides are pressed together, bulging out the peel, which will generate a much larger mist of oil. The peel is often discarded once done.
Flamed
This is exactly like the Zest, but an orange peel is held with one hand and the oil is expressed across a lit match, creating a little burst of flame. The burnt oil then lands on the drink giving it a toasty finish. The peel is then discarded. Some people like to use a lighter for fear that the match could drop into the drink. However, I find that it adds a lighter fluid taste to the drink. I will risk ruining a drink once in a blue moon to making it less appealing every time.
Channel Knife
A channel knife can be used to cut a very consistent thin strip of peel. In this case the cutting of the strip is what releases the oils, so this should be done directly above the drink surface. The peel is often curled and placed partially in, and partially out of the drink, allowing the drinker to remove it or drop the entire peel in. The fruit is typically cut spiral along its diameter, and the ribbon can be longer than the circumference by continuing along its width.
Honesty, that’s about it for the essentials. With these techniques, you can make everything from a martini to a Manhattan, a whiskey sour to a gin fizz. But you may want to up your game a little too. Following are a few specialized techniques you may want to master.
DEEPER DIVE

Rolling
Super easy. This is useful in complex or thick drinks, like a Bloody Mary, or one with pebble ice. If you are not using a mix (and can’t simply shake the bottle), there may be spices you need to incorporate into the thick tomato juice and thin vodka. Fill your glass with ice and add everything but the garnish. In another glass that is at least the same size, pour back and forth a couple of times, with the last pour back into the serving glass. You may want to use two pint glasses and serve into a third serving glass, as it can get messy. This is one technique that uses your mixing ice in the drink, and you free-pour everything back in. Add the garnishes, and you are done. It incorporates the flavors together and helps cool the drink faster, slowing dilution.
Layering/Capping
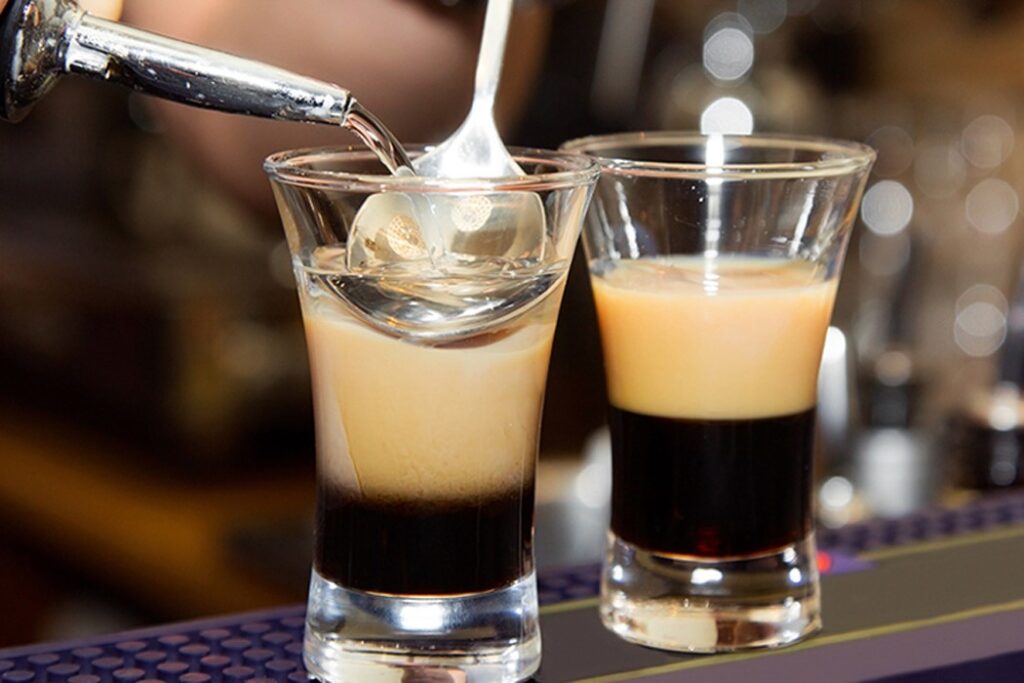
Layering is used for two primary purposes. The first is incredibly simple. Some drinks – specifically, but not limited tiki cocktails – often have a finishing rum (primarily) added to the top so the rum hits your nose first as you approach the drink. This will manner how you taste the drink, since the majority of taste is tied to the sense of smell. The layer of red wine at the top of a New York Sour is visually stunning, but the overall flavor profile is what makes the drink.
The second reason is visual effect. The cream roiling around at the top of a White Russian is dramatic, but you don’t want to suck down the cream first before you get to the rest of the drink. You typically give a White Russian or its cousin the Colorado Bulldog, a quick stir before drinking. If you are The Dude, you just use your finger.
Layering can be complicated – especially if you are going all in and making a Pousse Café style cocktail, where the layers are intended to stay separated, and the drink evolves as the layers intersect. But this is a very old technique, and not common anymore, except in shots. There are three techniques that work well in layering. The main goal is to think about the specific gravity of the liquid and add everything in order of its density. Sugary modifiers like Grenadine are often the lowest layer for that reason. The layers above become more complicated, You don’t want the liquid going in with such force that it rushes to the bottom and begins mixing on its own. Three techniques that work the best.

Bar Spoon
All these techniques benefit from the addition of a pour stopper in the liquid, to help limit and direct the amount and direction of the liquid, but it is not essential. Grab your bar spoon (really any spoon will work), and place it just above the lower layer, and as horizontal as you can in the glass. Slowly pour the next layer onto the spoon, and the liquid will enter the cocktail sideways, rather than straight down. You have to pour slowly, or it will agitate, and you will have a mini-blended layer between. Raise the spoon as you pour, staying right at the level of the top of the liquid until done with the layer. This can be difficult to get all that into the tiny mouth of a shot glass, so if you ae making lots of shots, you want to pick up a couple of pour stopper/bottle pourer.

Shaft of the Spoon
This is less common, because it requires a muddling bar spoon with a flat plate at the other end, but easier than the back of the spoon, especially in a small glass. Hold the plate at the top of the lower layer and place the mouth of the bottle (or pour stopper) against the shaft of the spoon. These spoons typically have a spiralized shaft which makes it easier to stir. But also controls the liquid from crashing down the shaft. A ribbon of liquid will curl down the shaft and hit the plate, then move horizontally onto the lower level. It is easier, but you have to remember that there is liquid on the shaft, so when you stop pouring, it will continue to be added to the glass.

The Maraschino Cherry
This trick is used primarily in bars, for its speed and availability of the cheap, Frankenstein red maraschino ‘cherries’. Grab a cherry by the stem and wipe or rinse it off. Using the stem, place the cherry halfway into the lower layer and pour the next layer gently onto the cherry and it will spread out evenly over the lower level. This is especially useful in a shot glass where the mouth of the glass is tight.
Capping
Capping usually consists of adding bitters to the top of a drink, doing double duty. It can be stunning to see a bright red ring of Peychaud’s bitters at the top of a cocktail, but the bitters are essential to the drink itself – not just for show. They will meld into the drink once you take your first taste, but you can give it a stir right away if the bitters are too strong. The complexity of the herbs in bitters will set your nose up for the complex relationships between the ingredients in the cocktail.

Muddling
Fresh fruit, vegetables, peppers, sugar, and mint are often muddled first to release either the juice from the fruit/vergatable or the oils from the leaves. But be careful, not all muddling is the same. If you are making a Caipirinha you want to add sugar and thick slices of lime with the peel on into your glass. You want to aggressively press and grind to release as much from the lime as possible and to dissolve the sugar. In an Old Fashioned you want to douse your sugar cube with bitters prior to adding it the glass, and grind away (or opt for the much easier simple syrup). But you have to be really careful with mint. In a Mojito, you want to toss a bunch of mint in the glass and add simple syrup, then press over and over, but do not grind (and use a flat bottom muddling stick). The oil sits on the surface of the leaves, and this will break the sacks and let the oils escape. But if you start to tear or break the mint leaves up, it will release the bitter from the inside of the leaf – taking the bright refreshing summer drink in a less favorable direction.
Infusing
Simple Syrup
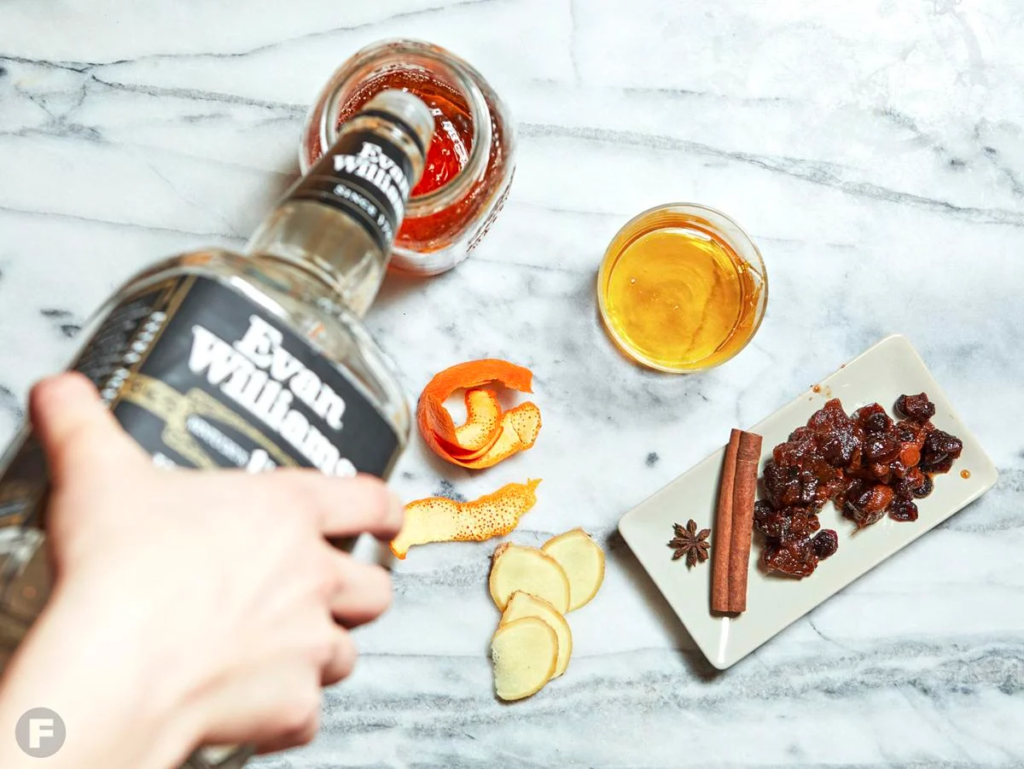
Infusing a syrup or spirit is a great way to add a different layer of complexity or seasonal component to a cocktail. Simple syrup is a staple in almost all cocktails – sugar is one of the four foundational ingredients in any cocktail. It helps take the bite out of a high-proof spirit and balances bitter and sour ingredients. A 1:1 ratio of water to sugar is your typical simple syrup, and 1(water):2(sugar) ratio produces a rich simple syrup (same sugar, less water in a cocktail). But if you infuse raspberries, cinnamon, cucumber, or even jalapeno int your syrup – well then you are talking about something that raises the bar. There are a ton of recipes on the internet, and each one will have a different timeframe for the infusion (10 minutes for raspberries and cinnamon for instance). The additive is usually added once the sugar is dissolved on the stove and strained once the infusion time is complete. Cool and use the syrup as you would simply syrup, and they will dramatically change your drink.
Spirits
Infusion of a spirit is a similar process, but while flavored simple syrup is typically (but not always) produced by heat, you don’t want to heat a spirit, or the alcohol will evaporate. Luckily alcohol is excellent at stripping away flavors and aromas (and heat in peppers). Treat it just like you would tea. Place it in a loose teas holder and drop it in. But taste it on a regular basis. It can strip the flavors quickly – jalapenos as little as 20 minutes, but dried herbs can take a day or two.

Swizzle
Swizzling comes from the island of Trinidad and was a traditional way to mix food during cooking. It uses the Quararibea turbinata branch, which has a series of branches that extend out at a right angle at the same point along the branch. Everything is trimmed and you end up with a series of sticks that naturally act as a blade with a long shaft that was above the cooking surface. But fill a tall glass with pebble or shaved ice and add a drink, and the swizzle action will super cool the drink very quickly. Very useful in a hot climate where you don’t want the ice to melt too quickly (remember if can cool down the liquid quickly, the ice will melt more slowly).
A swizzle stick is placed in the drink and the shaft is held between your palms. By sliding your palms back and forth, the stick rotates very quickly, and as your hands move up and down the ‘blades’ spin in an up and down motion. It won’t take long for frost to form on the glass, and you know you are done. Don’t have a super cool Le Bois Lélé stick? You can do basically the same thing with a bar spoon, spinning the bowl of the spoon in the drink. It’s a cool effect – and very refreshing on a hot day.
Next week: Glassware.
Cheers!
Bill
AotCB-048


